
Tuesday, September 29, 2015
Thursday, September 24, 2015

Tuesday, September 22, 2015

Monday, September 21, 2015
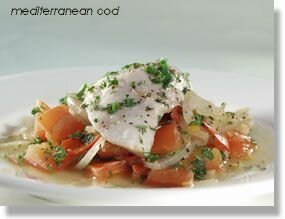
Mediterranean Cod with Tomatoes - Healthy Food Tip and Recipe
healthy food tip and recipe
Today's Recipe
If you don't know what to serve for dinner tonight ...Enjoy this low-fat meal with cod as part of your Healthiest Way of Eating this week. It contains less that 200 calories!
Ingredients:
- 1 lb cod fillets
- 2 medium onions, sliced medium thick
- 3 medium cloves garlic, chopped
- 1/2 cup + 1 TBS chicken or vegetable broth
- 2 cups fresh or 1 15 oz can (BPA-free) diced tomatoes
- 2 TBS fresh lemon juice
- *1/4 cup chopped black olives
- *1 TBS capers
- 1/2 cup chopped fresh basil
- 2 tsp chopped fresh rosemary
- 2 tsp chopped fresh thyme
- 1 lb cod fillets, cut into 2-inch pieces
- salt and cracked black pepper to taste
- red chili flakes to taste
- * optional
- Slice onions and chop garlic and let sit for 5 minutes to bring out their hidden health benefits.
- Heat 1 TBS broth in a 10-12 inch stainless steel pan or skillet. Healthy Sauté onion over medium heat for about 5 minutes in broth, until translucent. Add garlic and continue to sauté for another minute.
- Add rest of broth, diced tomatoes, and lemon juice. Bring to a simmer on high heat. Once it starts to simmer reduce heat to medium and simmer for about 5 minutes.
- Add herbs, olives, capers, and cod fillets; cover and simmer for about 5 minutes, depending on how thick the fish is. Season with salt and pepper to taste. Serve cod mixed with tomato herb sauce.
- Great Antipasto Salad
- Brown Rice
In-Depth Nutritional Profile for Mediterranean Cod with Tomatoes
Healthy Food Tip
If I boil vegetables in soup, keep the soup covered while cooking, and consume all of the liquid, am I losing any nutrients?
Yes, you will still be losing some nutrients when cooking fresh vegetables in a soup in a covered pot. There is no way to avoid nutrient loss with the exposure of raw vegetables to boiling or simmering water. However, by taking the step of covering the pot you are doing what you can to preserve the most nutrients. If you are adding leafy greens to your soup, you may want to add them at the end so that they don't cook for longer than they need to. Even though there is some nutrient loss with making soup, if you take these extra measures, your soup can be a nutrient-rich addition to your Healthiest Way of Eating.
Broiled Rosemary Chicken over Puréed Lentils and Swiss Chard Recipe
Today's Recipe
If you don't know what to serve for dinner tonight ...
This is a complete meal that is highly nutritious and delicious. It is a great meal to prepare when you have company and want to make something special.
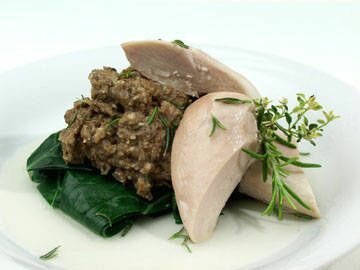
Broiled Rosemary Chicken over Puréed Lentils and Swiss Chard
Prep and Cook Time: 35 minutes
Ingredients:
If you don't know what to serve for dinner tonight ...
This is a complete meal that is highly nutritious and delicious. It is a great meal to prepare when you have company and want to make something special.
Ingredients:
- 3 boneless chicken breasts (6 oz each)
- 2 cups or 1 15 oz can (BPA free) lentils, drained
- 1 bunch Swiss chard
- 1 medium -sized onion, chopped
- 3 cloves garlic, chopped
- 1-1/2 cups crimini mushrooms, sliced
- 3 TBS vegetable or chicken broth
- 1/2 tsp dried thyme
- 1/2 tsp dried sage
- 1/2 cup walnuts
- 1 TBS + 3 TBS fresh lemon juice
- 1-1/2 TBS chopped fresh rosemary (or 2 tsp dried)
- 2 cloves pressed garlic
- 2 TBS + 1 TBS olive oil
- salt and pepper to taste
- Preheat the broiler on high and place an all stainless steel skillet (be sure the handle is also stainless steel) or cast iron pan about 6 inches from the heat for about 10 minutes to get it very hot.
- While the pan is heating, rinse and pat the chicken dry and season with lemon juice, salt, and pepper.
- Leaving the skin on, place the breast skin side up on the hot pan and return it to the oven. It is not necessary to turn the breast because it is cooking on both sides at once. Depending on the size, it should be cooked in about 7 minutes. Remove the skin before serving; it is left on to keep it moist while broiling. The breast is done when it is moist, yet its liquid runs clear when pierced. The inside temperature needs to reach 165 degrees Fahrenheit (74° Celcius).
- While chicken is broiling, bring pot of water large enough to cook the chard to a boil.
- Chop chard.
- Chop onion, garlic, mushrooms, thyme, and sage and then Healthy Sauté them in medium sauté pan over medium-low heat for just about 5 minutes, stirring frequently. Add lentils, walnuts and 3 TBS broth and heat through.
- Purée mixture in blender or food processor with salt and pepper to taste. You will have to scrape sides of blender with a rubber spatula a few times.
- When water has come to a boil, add chard and boil for 3 minutes.
- Drain chard and toss with 2 TBS olive oil and 1 TBS lemon juice and salt and pepper to taste.
- Place 3 TBS lemon juice, pressed garlic, chopped rosemary, salt, and pepper in small sauté pan and heat on stove for a minute. Turn off heat and whisk in 1 TBS olive oil.
- Remove skin from chicken, slice into thirds, and serve with puréed lentils and chard. Drizzle rosemary lemon broth over chicken and lentils. Serve.
Quote by Adalia John
“Each new day is a blank page in the diary of your life. The secret of
success is in turning that diary into the best story you possibly can.” ―
Douglas Pagels #BeBold #LiveYourDreams #ConfdenceIsKey

How To Draw A Flat Hand Lesson
How To Draw A Flat Hand
If you're interested in learning how to draw a pair of hands, then you must watch the video we've just uploaded at ...
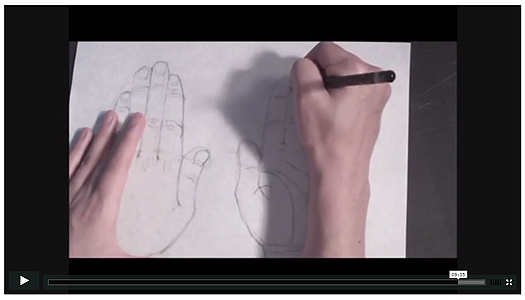
Trace your hand on the paper palm down, fingers together.
If
you draw the simplest shape possible that encompasses everything from
wrist to fingertip (leaving out the bulge of the thumb), you see a long
oval.Include the thumb, and the oval becomes a lopsided egg, or an iron shape.
Remember these shapes. Here, you traced your hand and then developed the shape, but only so you could see for yourself the most basic shape of the hand in his position.
When you draw hands in the future, you will begin with the basic shape and then fill in the interior shapes of the fingers within it.
Go back to your hand and examine where on the oval the different levels of knuckles and joints fall. What you see is that the halfway point between wrist and fingertip lines up with the point where the thumb begins to arch away from the fingers.
Vertically, divide the oval in half and you see the line between the ring finger and middle finger. If you divide the egg-shape that includes the thumb in half vertically, you have an approximate guideline for the division between the index and middle finger.
Use the angle of the line that attaches the thumb to the oval to judge the angle of division between the other fingers.
They should be parallel to the thumb. To place the guideline for the knuckles, draw an arc beginning at the horizontal center line and moving up to the highest point at the middle finger, then sloping down more drastically at the pinky side.
Draw a second arc about a third of the length up from that to serve as a guideline for the next joint, and repeat again for the last joint.
Chris Elmore
Drawing Made Easy

Sunday, September 20, 2015


Friday, September 18, 2015

Thursday, September 17, 2015

16 Delicious Summer Tomato Recipes

Whether it’s a simple caprese salad, veggie-topped flatbread, or chilled gazpacho, you’ll want to pin these 16 original tomato recipes to use all summer long.
CHECK OUT THE RECIPES HERE:
Grilled Artichokes with Garlic Aioli

Ingredient
-
2 lemons
-
4 large artichokes, (3-3 1/2 pounds total)
-
1 tablespoon extra-virgin olive oil
-
1/4 teaspoon salt
-
Freshly ground pepper, to taste
Directions
1.
To prepare artichokes: Fill a Dutch oven
with water; add the juice of 1 lemon. Trim leaves from the top of an
artichoke. Remove the outer layer(s) of leaves from the stem end and
snip all remaining spiky tips from the outer leaves. Trim an inch off
the bottom of the stem and use a vegetable peeler
to remove the fibrous outer layer. As each artichoke is prepared, drop
it into the lemon water to prevent it from turning brown.
2.
When all the artichokes are prepared,
cover the pan and bring to a boil. Boil until the base of the stem can
be pierced with a fork, 12 to 15 minutes. Transfer to a cutting board and let stand until cool enough to handle, about 10 minutes.
3.
Meanwhile, preheat grill to medium.
Slice the artichokes in half lengthwise. Scoop out the choke and first
few inner layers in the center until the bottom is revealed. Brush each
half with oil
and sprinkle with salt and pepper. Grill the artichokes until tender
and lightly charred, about 5 minutes per side. Transfer to a serving platter,
squeeze half a lemon over them and garnish with the remaining lemon
half cut into 4 wedges. Serve warm, at room temperature or chilled.
1.
Variation: For boiled artichokes, add 5
minutes to the cooking time in Step 2. Serve whole or cut in half and
scoop out the chokes.
2.
MAKE AHEAD TIP: Grilled artichokes will
keep, covered, in the refrigerator for up to 1 day and may be served
chilled.
nutrition information
Per Serving:
cal. (kcal)
109,
Fat, total (g)
4,
sat. fat (g)
1,
carb. (g)
17,
Monounsaturated fat (g)
3,
fiber (g)
9,
pro. (g)
5,
vit. C (mg)
20.67,
sodium (mg)
298,
Potassium (mg)
604,
Vegetables ()
1,
Fruit ()
0.5,
Fat ()
1,
Percent Daily Values are based on a 2,000 calorie diet
15-Minute Maui-Style Cod - Healthy Food Tip and Recipe
Today's Recipe
If you don't know what to serve for dinner tonight ...
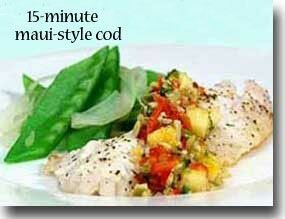
This is a great tasting fish dish that is not only quick and easy but has great taste. The tropical flavor of the sauce will make you feel like you are on Maui!
15-Minute Maui-Style Cod
Prep and Cook Time: 15 minutes
Ingredients:
In-Depth Nutritional Profile for 15-Minute Maui-Style Cod
Healthy Food Tip
In keeping with their Capsicum scientific classification, most peppers contain the very pungent and stimulating chemical called capsaicin. (Bell peppers are an exception to this rule, and do not contain capsaicin.) Research studies have examined potential benefits of capsaicin--when ingested in food or supplement form--with respect to stomach problems (including gastric ulcer), the common cold, inflammatory responses, blood fat levels, and other conditions. However, I believe that the jury is still out in these areas. In addition, there may be unwanted consequences of capsaicin intake for some individuals who are more sensitive to the "heat" aspect of hot peppers. For all of these reasons, I view the choice of "mild" versus "hot" as more of a personal preference at this point in time and look forward to future research that can help clarify these capsaicin-related issues.
If you don't know what to serve for dinner tonight ...
This is a great tasting fish dish that is not only quick and easy but has great taste. The tropical flavor of the sauce will make you feel like you are on Maui!
Ingredients:
- 1 1/2 lbs thick cut filets of cod
- 1 TBS fresh lemon juice
- salt and black pepper to taste
- Salsa
- 1 TBS minced fresh ginger
- 1/2 cup finely minced red bell pepper
- 3/4 cup canned crushed pineapple
- 1 tsp finely minced jalapeno pepper (or to taste)
- 1/2 TBS chopped fresh cilantro
- salt and white pepper to taste
- Mix together all ingredients for salsa and set aside.
- On stovetop, preheat 10-12 inch stainless steel skillet on medium high heat for 2-3 minutes. Rub 1 TBS fresh lemon juice on cod and season with salt and pepper.
- Cook fish in heated skillet about 1-2 minutes on each side. Time may vary according to thickness of fish. You do not need oil or liquid for this.
- Remove cod from pan and top with salsa.
- Napa Cabbage Salad
- Rice
In-Depth Nutritional Profile for 15-Minute Maui-Style Cod
Healthy Food Tip
Is there any advantage to eating hot peppers instead of mild ones?
In keeping with their Capsicum scientific classification, most peppers contain the very pungent and stimulating chemical called capsaicin. (Bell peppers are an exception to this rule, and do not contain capsaicin.) Research studies have examined potential benefits of capsaicin--when ingested in food or supplement form--with respect to stomach problems (including gastric ulcer), the common cold, inflammatory responses, blood fat levels, and other conditions. However, I believe that the jury is still out in these areas. In addition, there may be unwanted consequences of capsaicin intake for some individuals who are more sensitive to the "heat" aspect of hot peppers. For all of these reasons, I view the choice of "mild" versus "hot" as more of a personal preference at this point in time and look forward to future research that can help clarify these capsaicin-related issues.
15-Minute Healthy Sauteed Chicken & Asparagus - Healthy Food Tip and Recipe
Today's Recipe
If you don't know what to serve for dinner tonight ...
The chicken and asparagus combination in this recipe is a wonderful addition to your Healthiest Way of Eating. It not only tastes great but contains just 275 calories!
15-Minute Healthy Sautéed Chicken & Asparagus

Prep and Cook Time: 15 minutes
Ingredients:
If you don't know what to serve for dinner tonight ...
The chicken and asparagus combination in this recipe is a wonderful addition to your Healthiest Way of Eating. It not only tastes great but contains just 275 calories!
Ingredients:
- 1 medium onion, cut in half and sliced medium thick
- 3 medium cloves garlic, pressed
- 1 TBS chicken broth
- 1 TBS minced fresh ginger
- 1 large boneless, skinless chicken breasts, cut into 1 inch pieces
- 1 bunch asparagus, cut into 1-inch pieces (about 2 cups when cut)
- 2 TBS soy sauce
- 1 TBS rice vinegar
- pinch red chili flakes
- salt and white pepper to taste
- Cut onion and mince garlic and let both sit for at least 5 minutes to bring out their hidden health benefits.
- Heat 1 TBS broth in a 12-inch stainless steel skillet. Healthy Sauté onion in broth for about 2 minutes over medium-high heat, stirring constantly.
- Add ginger, garlic, chicken, and continue to Healthy Sauté for another 3-4 minutes, stirring constantly.
- Add asparagus, soy sauce, vinegar, and red chili flakes. Stir together and cover. Cook for another 2-3 minutes. This may have to cook for an extra couple minutes if the asparagus is thick. Season with salt and pepper to taste.
- Brown rice
- Cucumber, Seaweed Salad
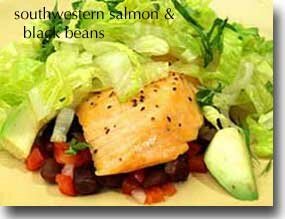
Southwestern Salmon & Black Beans - Healthy Food Tip and Recipe
Today's Recipe
If you don't know what to serve for dinner tonight ...
Add this amazing flavor blend that combines the sweetness of the salmon, richness of black beans, and the zestiness of the topping to your Healthiest Way of Eating and enjoy!
Southwestern Salmon & Black Beans
Prep and Cook Time: 30 minutes
Ingredients:
If you don't know what to serve for dinner tonight ...
Add this amazing flavor blend that combines the sweetness of the salmon, richness of black beans, and the zestiness of the topping to your Healthiest Way of Eating and enjoy!
Ingredients:
- 1-1/2 lb salmon cut into 4 pieces, skin and bones removed
- 1 small sized onion, minced
- 1 small sized red bell pepper, diced 1/4 inch
- 4 medium cloves garlic pressed
- 1 TBS + 1/2 cup chicken or vegetable broth
- 2 cups or 15 oz can black beans (BPA free), drained
- 1-1/2; TBS red chili powder
- about 2 cups shredded romaine lettuce, outer leaves discarded
- 1 medium avocado, cut into cubes
- Sauce:
- 2 TBS fresh chopped cilantro
- 1 TBS fresh chopped mint
- 1 TBS fresh chopped basil
- 3 TBS fresh lemon juice
- 3 TBS olive oil
- 1 TBS chopped pumpkin seeds
- salt and pepper to taste
- Season salmon with a little salt and pepper. Set aside while you chop and sauté vegetables.
- Mince onions and press garlic and let sit for at least 5 minutes to enhance their hidden health benefits.
- Heat 1 TBS broth in a 10-12 inch stainless steel skillet. When broth begins to steam add onion, bell pepper and garlic and Healthy Sauté on medium heat for about 5 minutes stirring frequently.
- Add 1/2 cup broth, drained beans, and red chili powder. Cook for another 10 minutes. Season with salt and pepper to taste.
- While beans are cooking, preheat broiler. Place a stainless steel or cast iron skillet large enough for salmon under the heat to get hot. This takes about 10 minutes.
- In a bowl mix together cilantro, mint, basil, lemon juice, olive oil, pumpkin seeds, salt and pepper.
- Place salmon in the hot pan and return to broiler about 5 inches from the heat source for best results. Broil salmon for about 7 minutes for medium doneness. This is our Quick Broil cooking method. Serve salmon, beans, lettuce and avocado together on a plate. Top salmon and lettuce with cilantro topping.


How To Draw A Happy Expression Lesson

A happy expression is more complex than simply drawing two eyes, a nose, and a turned-up mouth.
Every person has a different smile, and every smile can show varying degrees and sorts of happiness.Begin by drawing a face at rest. This will give you a refresher in the proportions of the face, which can be drawn in measurements of the eye length or by dividing the face in half vertically and horizontally.
When a person is facing forward and the head is straight, the irises lie on the center of the horizontal line, and can be sketched in as two circles.
If you divide the bottom vertical line into five equal segments, the bottom of the nose is on the second mark down, and the center of the mouth is the third line down.
The nostrils usually line up with the inside corners of the eyes, and the corners of the mouth in a relaxed position line up with the middle of the eyes.
The eyes are half and eye length wide, and are one eye width apart.
Chris Elmore
Drawing Made Easy
How To Sketch A Dog Lesson

http://drawing-made-easy.com/sample-video/animal-mastery-1-how-to-sketch-a-dog/
Before you paint or draw anything, you should always begin with a sketch.
Sketch your dog on a piece of scratch drawing paper, laying down loose, flowing lines of the largest shapes first.Get the head and body down on paper in their most basic approximate shape.
The head is a trapezoid, the body is an oval, the neck is a square or rectangle.
Seeing the body in terms of more basic shapes will help you to get the initial forms on paper quickly and efficiently without overwhelming you with detail.
Don’t draw as though you’re outlining the form. Oftentimes, beginning artists draw the head and fill in the face before the body is in place, and then work piecemeal, drawing the neck, back, tail and legs as they come to each in turn.
Instead, try to imagine that you’re carving the form out of large, simple shapes that express the overall shapes and angles.
Warm Regards
Chris Elmore
Drawing Made Easy
Wednesday, September 16, 2015
Indian-Style Lentils - Healthy Food Tip and Recipe
Today's Recipe
If you don't know what to serve for dinner tonight ...
Combine
this tasty lentil dish with rice for a hearty meatless meal to add to
your Healthiest Way of Eating. It will provide you with a complete
protein as well many other health-promoting nutrients.
Indian-Style Lentils

Prep and Cook Time: 20 minutes
Ingredients:
- 1 medium size onion, diced
- 1 TBS vegetable broth
- 2 cloves garlic, minced
- 1 tsp ginger
- 1/2 tsp turmeric
- 1/2 tsp salt
- 1 cup canned diced tomatoes
- 2 cups or 1 15-oz can (BPA free) lentils
- 1 cup frozen spinach
- Dice onions and mince garlic and let sit for at least 5 minutes to bring out their health-promoting properties.
- Healthy sauté onion in 1 TBS broth for 3 minutes.
- Add garlic, ginger, turmeric, salt, tomatoes and lentils.
- Simmer covered for 5-7 minutes.
- Add 1 cup frozen spinach and continue simmering for 2 more minutes.
What to Eat Now: Peppers

Quinoa-Stuffed Peppers
Ingredients
-
7 sweet peppers (red, orange and yellow)
-
1 cup Bob's Red Mill whole grain quinoa
-
1 tablespoon olive oil
-
1 cup diced sweet onion
-
1 teaspoon ground cumin
-
1/2 teaspoon cinnamon
-
1 cup dried figs, roughly chopped
-
1/2 cup unsalted cashews, roughly chopped
-
3/4 teaspoon salt
-
1/4 tablespoon pepper
Directions
1.
Heat oven to 375 degrees. Seed and dice 1
of the cooked peppers. Slice remaining 6 peppers from stem to bottom;
seed.
2.
In a medium lidded pot, bring 2 cups
water to a boil. Stir in quinoa; return to a boil. Cover, reduce to
medium-low and cook 10 minutes. (If using another brand of quinoa, cook
2/3 time shown on package.) Drain; set aside.
3.
Return pot to stove; place over medium heat. Add olive oil.
Stir in the 1 diced pepper and onion. Cook 5 minutes. Mix in cumin and
cinnamon; cook 1 more minute. Stir in figs, cashews, quinoa, salt and
pepper. Fill pepper halves with quinoa mixture and place cut-side up in a
9 x 13-inch baking dish. Cover with foil and bake at 375 degrees for 25 minutes. Remove foil and bake another 30 minutes or until peppers are tender.
Tip
-
health booster Quinoa
Quinoa is high in magnesium, which is known to reduce headaches and regulate blood sugar.
nutrition information
Per Serving:
cal. (kcal)
482,
Fat, total (g)
15,
chol. (mg)
0,
sat. fat (g)
2,
carb. (g)
83,
fiber (g)
13,
pro. (g)
12,
sodium (mg)
466,
Mark as Free Exchange ()
0,
Percent Daily Values are based on a 2,000 calorie diet

Tuesday, September 15, 2015

Monday, September 14, 2015
What Science Is Telling Us About The Heart’s Intuitive Intelligence November 24, 2014 by Arjun Walia

The wonderful and brilliant scientists over at the Institute of HeartMath have done some amazing work in shedding a light on the science of the heart.
The Institute of HeartMath is an
internationally recognized nonprofit research and education organization
dedicated to helping people reduce stress, self-regulate emotions, and
build energy and resilience for healthy, happy lives. HeartMath tools,
technology, and training teach people to rely on the intelligence of
their hearts in concert with that of their minds at home, school, work,
and play.
A large portion of their research has
investigated heart and brain interaction. Researchers have examined how
the heart and brain communicate with each other and how that affects our
consciousness and the way in which we perceive our world. For example,
when a person is feeling really positive emotions like gratitude, love,
or appreciation, the heart beats out a certain message. Because the
heart beats out the largest electromagnetic field produced in the body,
researches are able to gather significant data from it. According to
Rolin McCratey, Ph.D, and director of research at the Institute:
Emotional information is actually coded and modulated into these fields. By learning to shift our emotions, we are changing the information coded into the magnetic fields that are radiated by the heart, and that can impact those around us. We are fundamentally and deeply connected with each other and the planet itself.
This is very important work, as again,
it shows how the heart plays an important role far beyond what is
commonly known. Did you know that your heart emits electromagnetic
fields which change according to your emotions? Did you know that the
human heart has a magnetic field that can be measured up to several feet
away from the human body? Did you know that positive emotions create
physiological benefits in your body? Did you know that you can boost
your immune system by conjuring up positive emotions? Did you know that
negative emotions can create nervous system chaos, and that positive
emotions do the complete opposite? Did you know that the heart has a
system of neurons which have both short term and long term memory, and
that their signals sent to the brain can affect our emotional
experiences? Did you know that in fetal development, the heart forms and
starts beating before the brain is developed? Did you know that a
mother’s brainwaves can synchronize to her baby’s heartbeats? Did you
know that the heart sends more information to the brain than vice versa?
All of these facts, published researched papers, and more can be accessed at heartmath.org.
How To Add LIFE To Your Portraits by Drawing Made Easy

If
you're interested in learning how to add life to your portraits and
make them more realistic, then you must watch the video we've just
uploaded at ...
All you really need to get started in drawing is a pencil and paper.
However, to get the most out of this course, consider purchasing the following:
Three
pencils, either charcoal or graphite, in hardnesses 2H, HB, and 4B.
Most of your work will be done with those three pencils.If you want to invest in a wider range, of course that is your choice.
You won’t need a pencil harder than a 3H or softer than a 6B for any of the techniques in this course.
A kneaded eraser (or two or threeß)
Blending stomps (also called blending stumps or tortillons) in a variety of sizes
A blending chamois cloth or a piece of white felt
A sketchbook of drawing paper (for finished drawings I recommend 140# acid free paper)
Inexpensive hand-held pencil sharpeners and a piece of medium sandpaper
Frisket film, tracing paper, and something with a fine tip that won’t tear paper, such as a stylus, bamboo skewer or sharpened dowel
Once you have your supplies gathered, take some time to acquaint yourself with how to hold your pencil to access the tip (a basic writing hold) or the side (the hold you use to put down tone).
Warm Regards
Chris Elmore
Drawing Made Easy
Taking Control of Your Life by Craig Coppola

Rule #4 from my book The Fantastic Life: All of Life is Connected
Everything in life, from people, attitudes, habits, and more, are connected. When you make a change in one area, there are ripple effects that touch all other areas. Like the highlighted quote, simply changing your thoughts can alter your destiny. Take the time to focus on the things you can control and watch how your life follows in the same direction.
Curing Victimitis
by MICHAEL JOSEPHSON
MARCH 31, 2014

Watch your thoughts; they lead to attitudes.{Click to Tweet
Watch your attitudes; they lead to words.
Watch your words; they lead to actions.
Watch your actions; they lead to habits.
Watch your habits; they form your character.
Watch your character; it determines your destiny.
These words of unknown origin tell us that our silent and often
subconscious choices shape our future. Every aspect of our lives,
at home and at work, can be improved if we use our power to
think, reflect, and make conscious choices about our thoughts,
attitudes, words, actions, and habits.
Instead, many of us think of ourselves as victims. We complain
about our circumstances and what others did to us. Whatever
psychological comfort there is in feeling powerless and
blameless when things aren’t going right, victims lead
unsatisfied lives in the end.
We’re most vulnerable to victimitis when we’re under the
influence of powerful emotions like fear, insecurity, anger,
frustration, grief, and depression. These feelings can be so
overwhelming that we believe our state of mind is inevitable.
Our only hope is that they’ll go away on their own. Yet it’s
during times of emotional tumult that using our power to choose
our thoughts and attitudes is most important. We can’t make
pain go away, but we can refuse to suffer.
Even when we don’t like any of our choices, we do have
some – once we realize we can take control. It isn’t easy,
but what we do and how we choose to feel about ourselves
can have a profound impact on the quality of our lives.
Victims may get sympathy for a while, but that isn’t nearly enough.
Taking personal responsibility for our happiness and
success can be scary, but the payoff is enormous. Although
we can’t make our lives perfect, we can make them better
usually a lot better.


Subscribe to:
Posts (Atom)
-
 "An unwritten want is a wish, a dream, a never-happen. The day you put your goal in writing is the day it becomes a commitment that wil...
 -
 Having als is no fun. It is a very hard illness to accept. Nothing prepares you for it. Been diagnosed with it almost a year and half ag...